前端技术:粒子动画特效
最近在Observable这个网站上看到一个动态特效,一些原本散乱的随机粒子,随着用户滚动页面,会逐渐组成一个清晰的头像。
我大受震撼,很好奇,于是开始着手复现。
1、粒子效果
1.1、创建
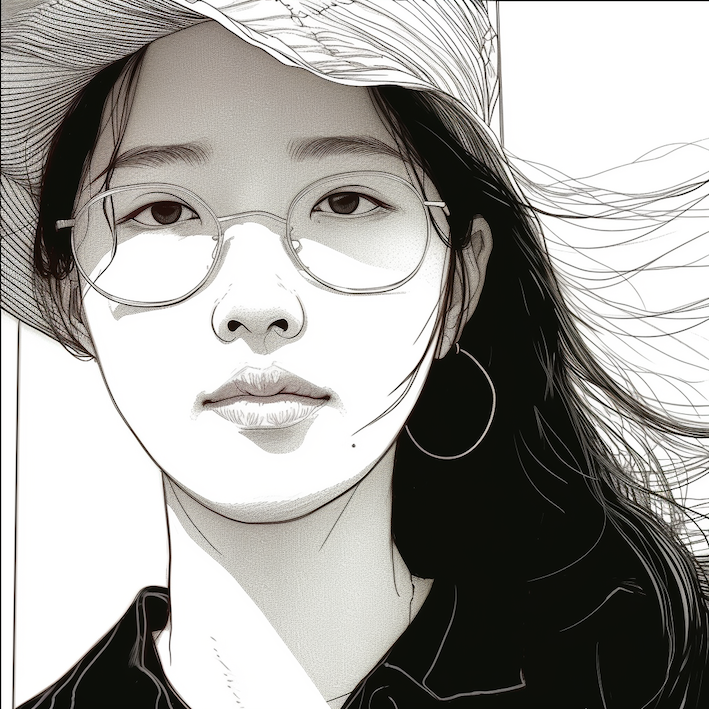
首先要做的,是给定一个图片1,就能生成它对应的粒子图。
这里需要一个思维转换 ,
- 一个图片对象
<img>经过在offCanvas上绘画,就变成了类似python中的tensor了,可以读取具体的0-255的数值,shape=[H, W, C=4]; -
offScreenCanvas技术:是一个创建出来的canvas对象,只用来读取图片,但没在html中定义,因而也不会显示出来 -
轮训图片的长和宽,当RGB值超过一个阈值后,创建一个粒子点对象,暂时不绘制,只记录下
[H, W, C]信息(带颜色信息C = [R, G, B, A]的效果比黑白的更佳)
// 绘制缩放后的图片
const offCanvas = document.createElement('canvas');
offCanvas.width = width;
offCanvas.height = height;
const offCtx = offCanvas.getContext('2d');
offCtx.drawImage(img, 0, 0, width, height);
const imageData = offCtx.getImageData(0, 0, width, height).data;

// 生成粒子列表
particles = [];
for (let x = 0; x < width; x += gridSize) {
  for (let y = 0; y < height; y += gridSize) {
    const index = (x + y * width) * 4;
    const alpha = imageData[index] * 0.299 + imageData[index + 1] * 0.587 + imageData[index + 2] * 0.114; // 灰度值
    if ((alpha >= alphaThreshold && colorScheme === "dark" ) || (alpha <= alphaThreshold && colorScheme === "light")) {
      const r = imageData[index];
      const g = imageData[index + 1];
      const b = imageData[index + 2];
      particles.push(new Particle(x, y, r, g, b, particleSize));
    }
  }
}
这个阈值可以和主题相关:当深色主题时,我们是 保留 “白度”较高的点,在亮色主题时,则相反。注意看, 不是进行反色操作。
- 浅色背景:

- 深色背景:

1.2、运动
粒子对象出了颜色和大小属性外,主要有三个位置信息,
- 初始位置:随机初始化
- 目标位置:粒子图的位置
- 当前位置:初始和目标间的线性插值,插值比例变量
progress控制,值在0.0-1.0之间变化
当用户每次滑动(scrollY)的时候,progress也相应变化,计算出新的位置{x, y}(调用Particle.update),并在画布canvas上重绘(调用Particle.draw),这样就形成了运动。
class Particle {
  constructor(destX, destY, r, g, b, particleSize = 4) {
    this.startX = Math.random() * ww;
    this.startY = Math.random() * wh;
    this.x = this.startX;
    this.y = this.startY;
    this.destX = destX;
    this.destY = destY;
    this.color = `rgb(${r}, ${g}, ${b})`;
    this.size = Math.random() * particleSize + 1;
  }

  update(progress) {
    this.x = this.startX + (this.destX - this.startX) * progress;
    this.y = this.startY + (this.destY - this.startY) * progress;
  }

  draw() {
    ctx.fillStyle = this.color;
    ctx.beginPath();
    ctx.arc(this.x, this.y, this.size, 0, Math.PI * 2);
    ctx.fill();
  }
}
2、交互
有了粒子图,希望能够随着用户上下滚动,能得到一个进度比例,让画布上的粒子动起来。
2.1、滑动
在用户滑动时,浏览器会收到scroll事件,给这个事件加一个callback,让Particle进行重绘。
function onScroll() {
  // 滚动事件处理
  if (!throttleTimer) {
    throttleTimer = setTimeout(() => {
      throttleTimer = null;
      needsUpdate = true;
      requestAnimationFrame(render);
    }, THROTTLE_DELAY);
  }
}

function render() {
  // 渲染粒子动画
  if (!needsUpdate) return;
  needsUpdate = false;

  // 更新进度
  const progress = animationComplete? 1 : calculateProgress();

  // 重绘
  ctx.clearRect(0, 0, ww, wh);
  particles.forEach((particle) => {
    particle.update(progress);
    particle.draw();
  });

  if (progress < 1) {
    requestAnimationFrame(render);
  } else {
    // 动画完成后,取消动画效果及事件监听
    if (!animationComplete) {
      animationComplete = true;
      animationCompleteScrollY = window.scrollY;
      window.removeEventListener('scroll', onScroll);
      window.addEventListener('scroll', onScrollAfterAnimation, { passive: true });
    }
  }
}

window.addEventListener('scroll', onScroll, { passive: true });
性能相关
其中,会在render函数外面套两个东西,都是GPT给出的性能相关的增强建议
requestAnimationFrame据说是提高动画连贯性的throttleTimer,是怕用户滚动太快,控制帧率用的
2.2、视觉暂留
Observable里原始的效果是随着图片的移动,粒子在运动。
但我希望,图片能在视窗中停留一段时间,直到动画进度完成,再随之移动。然而,这个停留的逻辑实验了很多都不理想,目前方案记录如下,
- 创建两层容器,
scrollContainer和particleContainer,内层容器particleContainer设置为图片高度,外层容器scrollContainer设置成两倍图片高度 - 外层设置
position: relative,内层设置position: sticky
<div id="scroll-animation">
  <div id="particle-container" style="top: 100px;">
    <!-- 用于显示头像的容器 -->
    <img id="profile-image" src="/assets/gallery/e8812b99614b4df5911b5a4a5f090668.png" alt="Profile Image" data-grid-size="3" data-alpha-threshold="190" data-dark-alpha-threshold="120" data-particle-size="2">
    <!-- 粒子动画的 canvas -->
    <canvas id="particle-canvas"></canvas>
  </div>
</div>
/* 包含粒子动画的滚动容器,高度设置为 200vh,提供足够的滚动空间 */
#scroll-animation {
  position: relative;
  height: 200vh; /* 实际在程序中设定2倍高度 */
}

/* 粒子容器设置为 sticky,当用户滚动时,它会保持在视口内 */
#particle-container {
  position: sticky;
  top: 50px;
  height: 100vh; /* 实际在程序中设定 */
  overflow: hidden;
}
-
最初,外层和内层对齐
-
向下滚动后,内外层同步往页面上方移动;
-
内层在滑动页面顶端(
top=50px)时,就会保持静止,形成视觉暂留,内外层开始相对运动; -
继续向下滚动,滚动一个图片高度后,内层和外层的底部会对齐
- 再向下滚动,内外同步向页面上方移动,通过js脚本减少外层的高度,直到内外高度一致
在这个模式下,进度progress等于外层容器划出pageTop的距离,除以图片高度后的占比。
3、总结
目前的效果基本达到了预期 


附录:完整代码
<div id="scroll-animation">
  <div id="particle-container">
    <!-- 用于显示头像的容器 -->
    <img id="profile-image" src="/assets/gallery/e8812b99614b4df5911b5a4a5f090668.png" alt="Profile Image" data-grid-size="3" data-alpha-threshold="190" data-dark-alpha-threshold="120" data-particle-size="2">
    <!-- 粒子动画的 canvas -->
    <canvas id="particle-canvas"></canvas>
  </div>
</div>
/* 包含粒子动画的滚动容器,高度设置为 200vh,提供足够的滚动空间 */
#scroll-animation {
  position: relative;
  height: 200vh; /* 你可以根据需要调整高度 */
}

/* 粒子容器设置为 sticky,当用户滚动时,它会保持在视口内 */
#particle-container {
  position: sticky;
  top: 50px; /* header height */
  height: 100vh; /* 占满视口高度 */
  overflow: hidden;
}

/* 隐藏原始图片,但保留用于生成粒子 */
#profile-image {
  display: none;
}

/* 调整 Canvas 的样式,使其填充父容器 */
#particle-canvas {
  position: absolute;
  top: 0;
  left: 0;
}

/* 可选:针对较大屏幕设备的设置 */
@media (min-width: 396px) {
  #particle-container {
    max-width: 396px;
    margin: 0 auto; /* 水平居中 */
  }
}
const ParticleAnimation = (function() {
  const THROTTLE_DELAY = 25;
  const DEFAULT_GRID_SIZE = 6;
  const DEFAULT_ALPHA_THRESHOLD = 180;
  const DEFAULT_DARK_ALPHA_THRESHOLD = 120;
  const DEFAULT_PARTICLE_SIZE = 4;

  let canvas, ctx, img, container, scrollContainer;
  let particles = [];
  let ww, wh;
  let needsUpdate = true;
  let throttleTimer;
  let currentColorScheme;
  let animationComplete = false;
  let reducedHeight = false;
  let animationCompleteScrollY;
  let resizeObserver;
  let metaObserver;

  class Particle {
    // 粒子类定义
    constructor(destX, destY, r, g, b, particleSize = 4) {
      this.startX = Math.random() * ww;
      this.startY = Math.random() * wh;
      this.x = this.startX;
      this.y = this.startY;
      this.destX = destX;
      this.destY = destY;
      this.color = `rgb(${r}, ${g}, ${b})`;
      this.size = Math.random() * particleSize + 1; // 调整粒子大小
    }

    update(progress) {
      this.x = this.startX + (this.destX - this.startX) * progress;
      this.y = this.startY + (this.destY - this.startY) * progress;
    }

    draw() {
      ctx.fillStyle = this.color;
      ctx.beginPath();
      ctx.arc(this.x, this.y, this.size, 0, Math.PI * 2);
      ctx.fill();
    }
  }

  function getParticleConfig() {
    const gridSize = parseInt(img.dataset.gridSize, 10) || DEFAULT_GRID_SIZE;
    const particleSize = parseInt(img.dataset.particleSize, 10) || DEFAULT_PARTICLE_SIZE;
    return { gridSize, particleSize };
  }

  function getAlphaThreshold(colorScheme) {
    return colorScheme === "dark" ?
      (parseInt(img.dataset.darkAlphaThreshold, 10) || DEFAULT_DARK_ALPHA_THRESHOLD) :
      (parseInt(img.dataset.alphaThreshold, 10) || DEFAULT_ALPHA_THRESHOLD);
  }

  function createOffscreenCanvas(width, height) {
    const offCanvas = document.createElement('canvas');
    offCanvas.width = width;
    offCanvas.height = height;
    return offCanvas;
  }

  function extractImageData(offCtx, width, height) {
    return offCtx.getImageData(0, 0, width, height).data;
  }

  function generateParticles(imageData, width, height, gridSize, alphaThreshold, colorScheme, particleSize) {
    const newParticles = [];
    for (let x = 0; x < width; x += gridSize) {
      for (let y = 0; y < height; y += gridSize) {
        const index = (x + y * width) * 4;
        const alpha = imageData[index] * 0.299 + imageData[index + 1] * 0.587 + imageData[index + 2] * 0.114;
        if ((alpha >= alphaThreshold && colorScheme === "dark") || (alpha <= alphaThreshold && colorScheme === "light")) {
          const r = imageData[index];
          const g = imageData[index + 1];
          const b = imageData[index + 2];
          newParticles.push(new Particle(x, y, r, g, b, particleSize));
        }
      }
    }
    return newParticles;
  }

  function createParticles() {
    const { gridSize, particleSize } = getParticleConfig();
    const colorScheme = getPreferredColorScheme();
    const alphaThreshold = getAlphaThreshold(colorScheme);
    const scale = window.devicePixelRatio;
    const width = container.offsetWidth;

    // 检查除以 0 的错误
    if (img.naturalWidth === 0 || img.naturalHeight === 0) {
      console.warn("图片尚未加载完成,跳过粒子创建。");
      return; // 直接返回,不进行后续计算,等待图片加载完成后再次调用
    }
    const height = Math.min(container.offsetWidth * img.naturalHeight / img.naturalWidth, container.offsetHeight);

    canvas.width = width * scale;
    canvas.height = height * scale;
    canvas.style.width = `${width}px`;
    canvas.style.height = `${height}px`;

    ctx.scale(scale, scale);

    ww = width;
    wh = height;

    const offCanvas = createOffscreenCanvas(width, height);
    const offCtx = offCanvas.getContext('2d');
    // 绘制缩放后的图片
    offCtx.drawImage(img, 0, 0, width, height);
    const imageData = extractImageData(offCtx, width, height);

    particles = generateParticles(imageData, width, height, gridSize, alphaThreshold, colorScheme, particleSize);

    if (particles.length === 0) {
      console.warn('未生成任何粒子,请检查图片或参数设置。');
    } else {
      console.log(`生成 ${particles.length} 个粒子。`);
    }
  }

  // 计算滚动进度
  function calculateProgress() {
    const rect = scrollContainer.getBoundingClientRect();
    const totalScroll = container.offsetHeight;
    const scrolled = -rect.top;
    let progress = scrolled / totalScroll;
    progress = Math.min(Math.max(progress, 0), 1);
    return progress;
  }

  // 渲染粒子动画
  function render() {
    if (!needsUpdate) return;
    needsUpdate = false;

    ctx.clearRect(0, 0, ww, wh);

    const progress = animationComplete? 1 : calculateProgress();
    particles.forEach((particle) => {
      particle.update(progress);
      particle.draw();
    });

    // 如果没有到达动画结束,继续请求动画帧
    if (progress < 1) {
      requestAnimationFrame(render);
    } else {
      if (!animationComplete) {
        animationComplete = true;
        animationCompleteScrollY = window.scrollY;
        window.removeEventListener('scroll', onScroll);
        window.addEventListener('scroll', onScrollAfterAnimation, { passive: true });
      }
    }
  }

  function getPreferredColorScheme() {
    const meta = document.querySelector('meta[name="color-scheme"]');
    return meta ? meta.content : 'light';
  }

  function onScroll() {
    // 滚动事件处理
    if (!throttleTimer) {
      throttleTimer = setTimeout(() => {
        throttleTimer = null;
        needsUpdate = true;
        requestAnimationFrame(render);
      }, THROTTLE_DELAY);
    }
  }

  function onScrollAfterAnimation() {
    // 滚动结束后的事件处理, 收紧容器高度
    if (reducedHeight) return;
    if (scrollContainer.offsetHeight <= container.offsetHeight) {
      reducedHeight = true;
      window.removeEventListener('scroll', onScrollAfterAnimation);
      return;
    }
    const diff = animationCompleteScrollY - window.scrollY;
    // console.log(`diff: ${diff}`, `scrollY: ${window.scrollY}`, `animationCompleteScrollY: ${animationCompleteScrollY}`)
    if (diff > 0) {
      scrollContainer.style.height = `${scrollContainer.offsetHeight - 0.5 * (diff)}px`;
    }
    animationCompleteScrollY = window.scrollY;
  }

  function init() {
    canvas = document.getElementById('particle-canvas');
    ctx = canvas.getContext('2d');
    img = document.getElementById('profile-image');
    container = document.getElementById('particle-container');
    scrollContainer = document.getElementById('scroll-animation');

    // 根据图片宽高比动态计算高度,并设置容器高度
    const height = Math.min(container.offsetWidth * img.naturalHeight / img.naturalWidth, container.offsetHeight);
    container.style.height = `${height}px`;
    const headerHeight = parseInt(container.style.top, 10);
    scrollContainer.style.height = `${headerHeight + 2 * height}px`;

    window.addEventListener('scroll', onScroll, { passive: true });

    // 使用 ResizeObserver 监听容器大小变化
    resizeObserver = new ResizeObserver(() => {
      createParticles();
      needsUpdate = true;
      render();
    });
    resizeObserver.observe(container);

    // 主题切换监听
    const meta = document.querySelector('meta[name="color-scheme"]');
    if (meta) {
      currentColorScheme = meta.content;
      metaObserver = new MutationObserver(() => {
        const newColorScheme = meta.content;
        if (newColorScheme !== currentColorScheme) {
          currentColorScheme = newColorScheme;
          createParticles();
          needsUpdate = true;
          render();
        }
      });
      metaObserver.observe(meta, { attributes: true, attributeFilter: ['content'] });
    }

    render();
  }

  return {
    init: init,
    destroy: () => {
      window.removeEventListener('scroll', onScroll);
      window.removeEventListener('scroll', onScrollAfterAnimation);
      if (resizeObserver) {
        resizeObserver.disconnect();
      }
      if (metaObserver){
        metaObserver.disconnect();
      }
    }
  };
})();

document$.subscribe(() => {

  // 检查图片是否已加载
  const img = document.getElementById('profile-image');
  if (!img) return;
  if (img.complete) {
    ParticleAnimation.init();
  } else {
    img.onload = ParticleAnimation.init;
  }
  // const destroy = ParticleAnimation.init();
  return () => {
    ParticleAnimation.destroy();
  }
});
版权声明
以上文章为本人@迪吉老农原创,文责自负。文中如有引用他人内容的部分(包括文字或图片),均已明文指出,或做出明确的引用标记。如需转载,请联系作者,并取得作者的明示同意。感谢。
-
示例图片是Midjourney AI经提示生成 ↩

